Add Thermostat
Welcome to Libertas Thermostat.
Take a Picture of Old Thermostat Wiring
If this is a replacement thermostat of the old thermostat, please first take a picture of old wiring.
Setup You HVAC Units
If you haven’t setup information about HVAC units of your home, please do so.
Read “Manage HVAC Units” for more details.
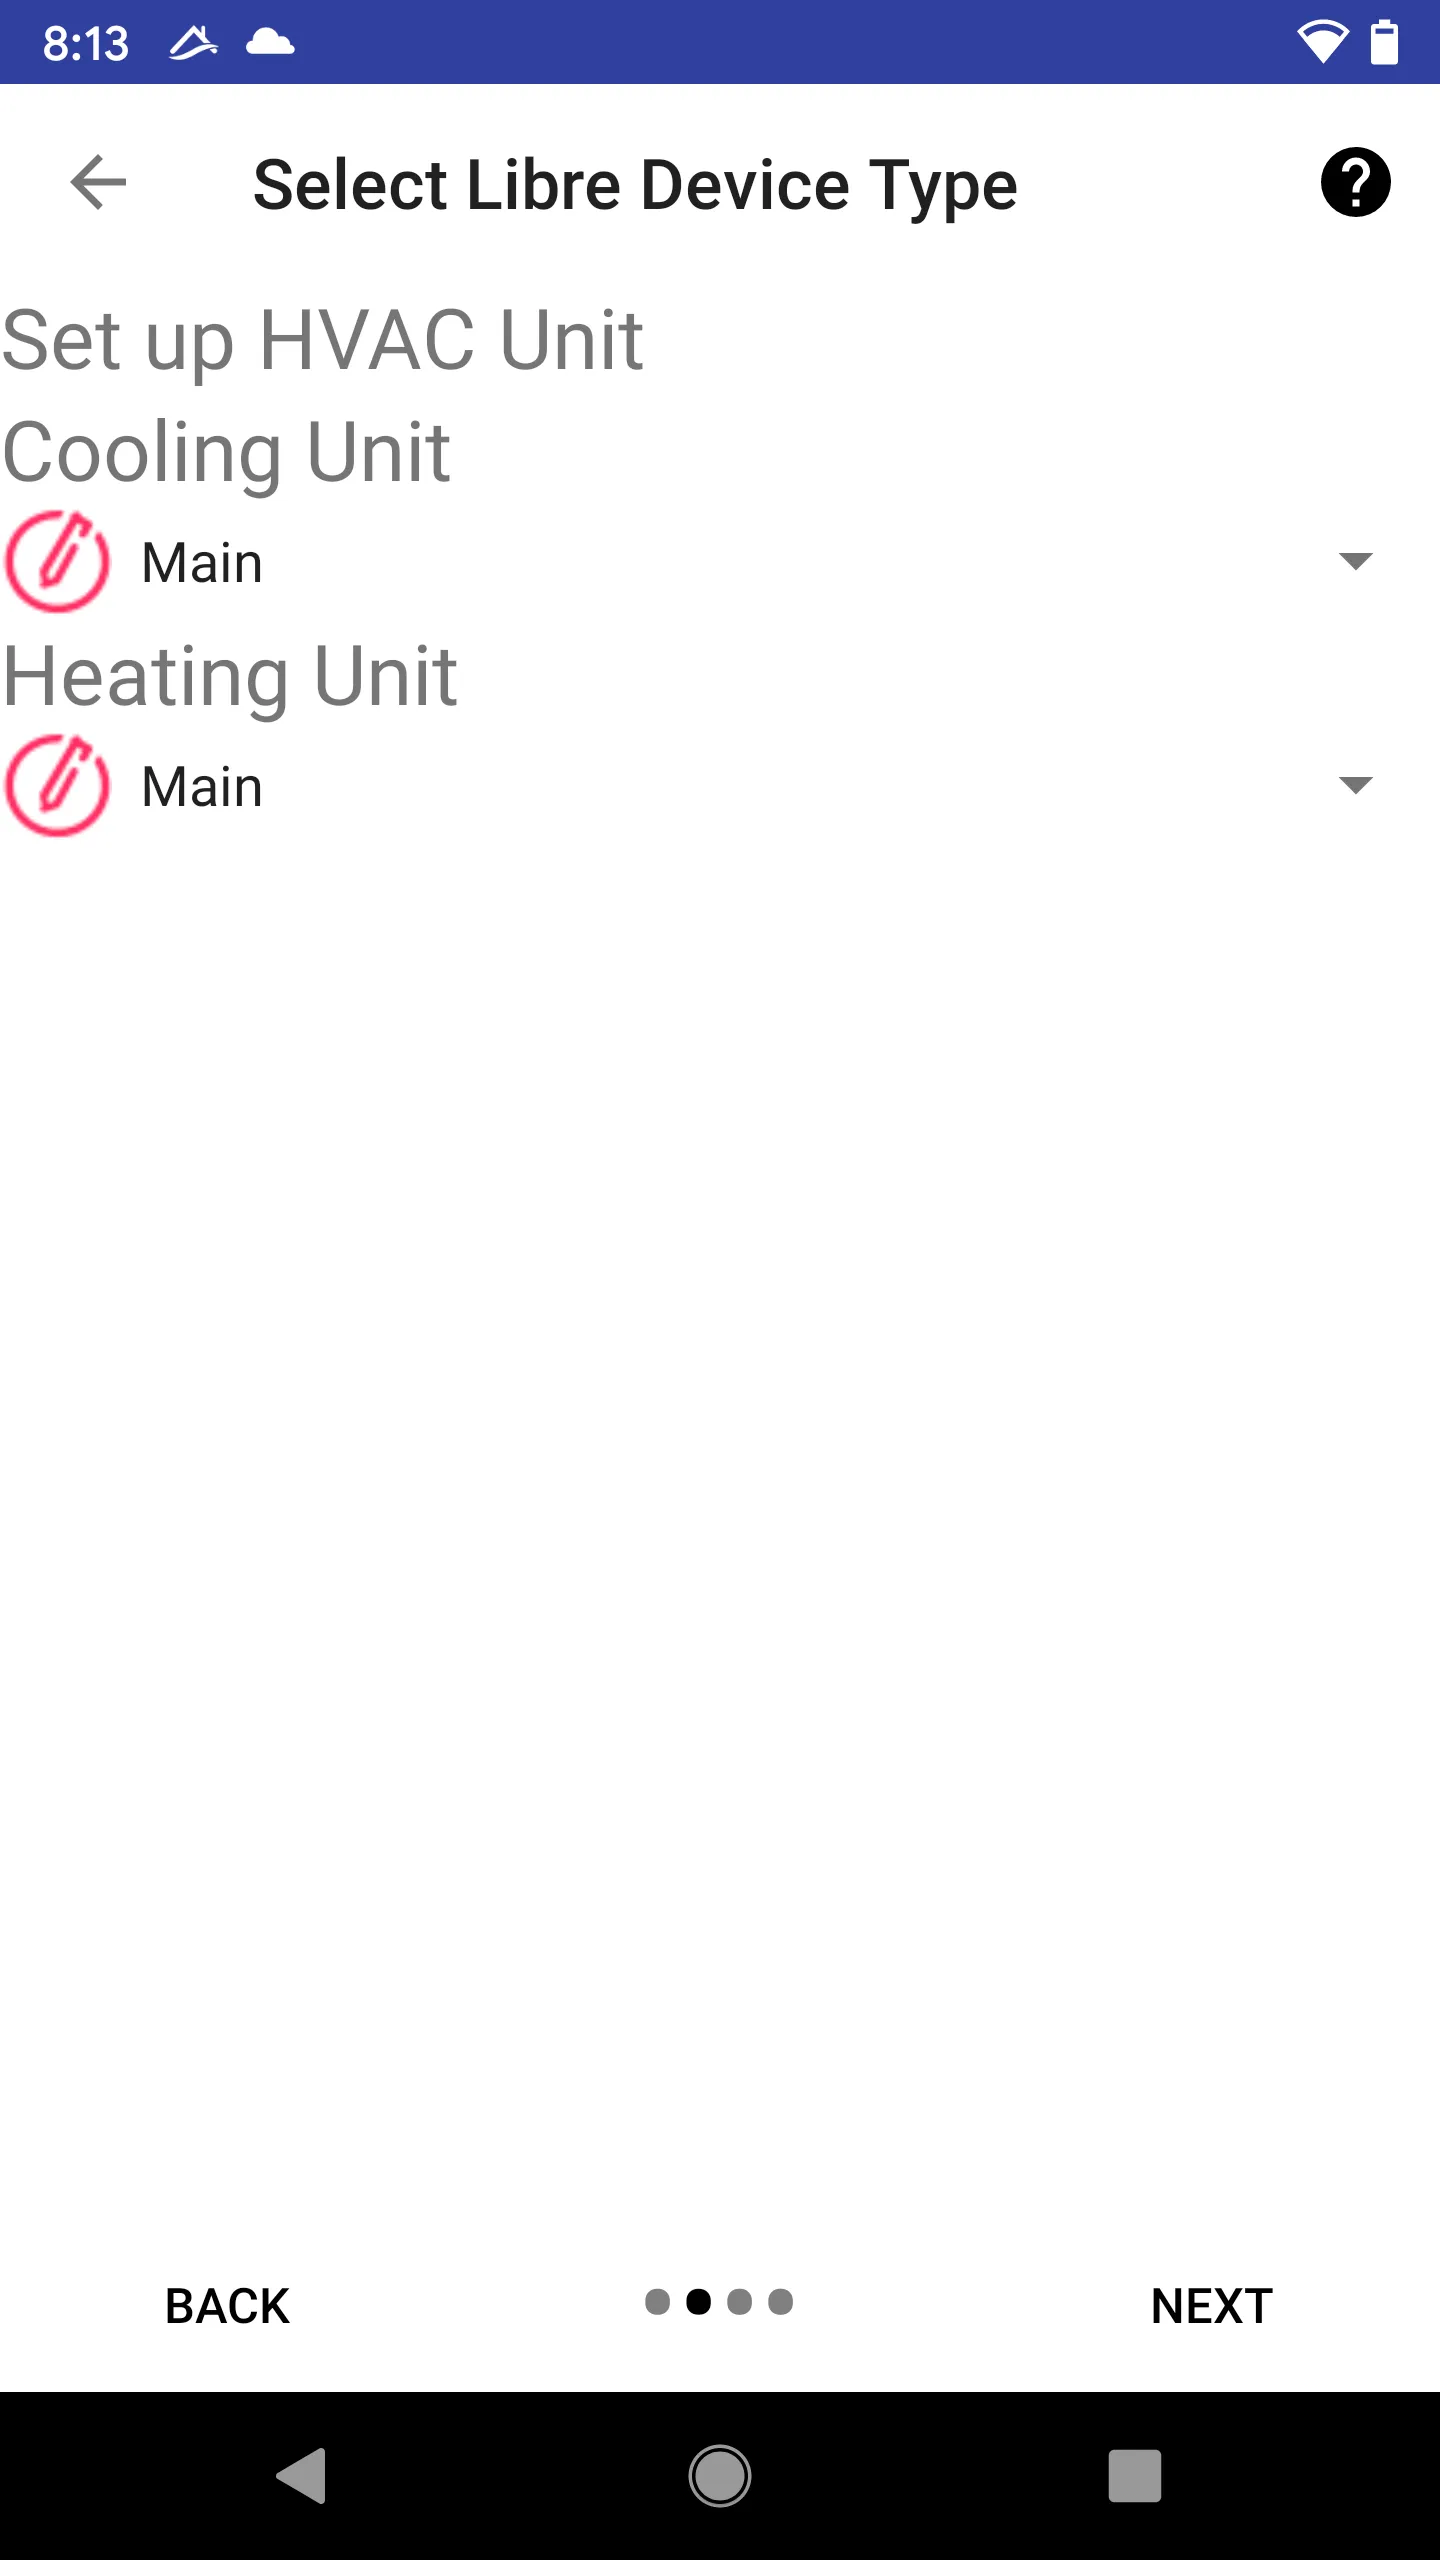
Specify Heat and Cool Units
If you have more than one cool or heat units, you need to choose the correct one.
Or you can add new units at this time.
Note, a thermostat can be “heat only” or “cool only”. So it is OK to leave one unit blank. But the user has to specify at least one unit (cool or heat).
The heating and cooling units of thermostat can also be different HVAC units.
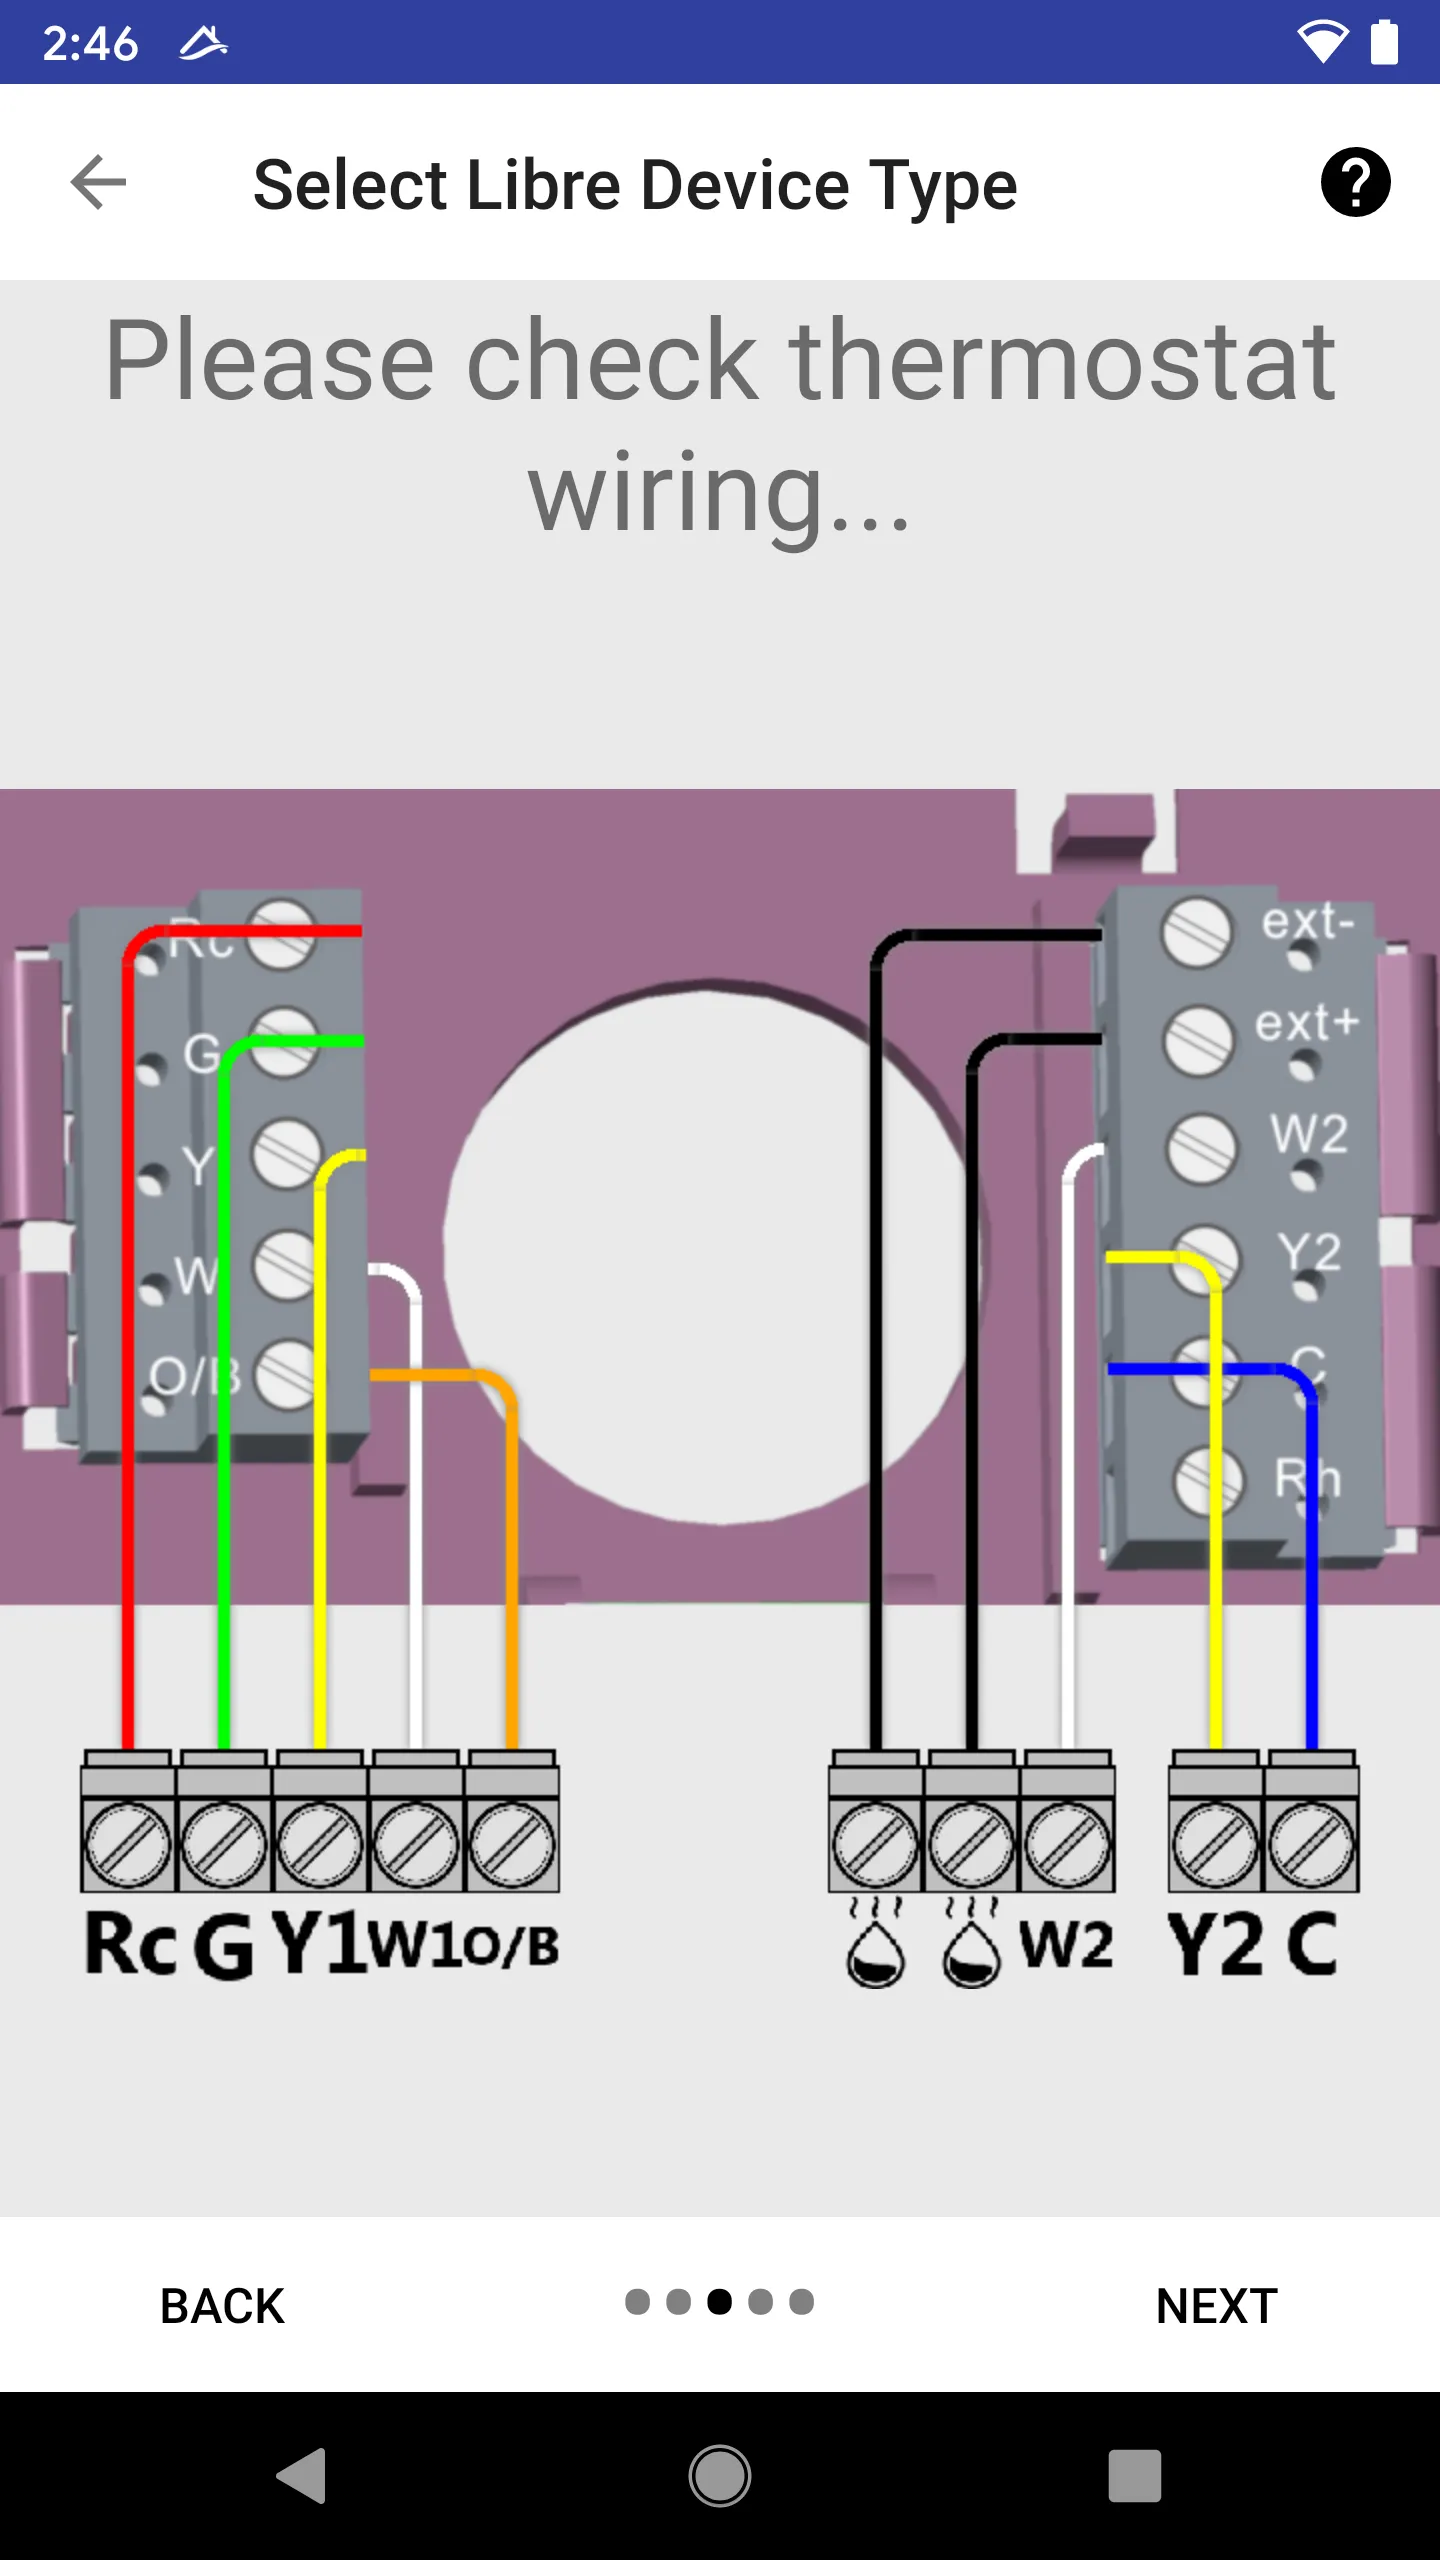
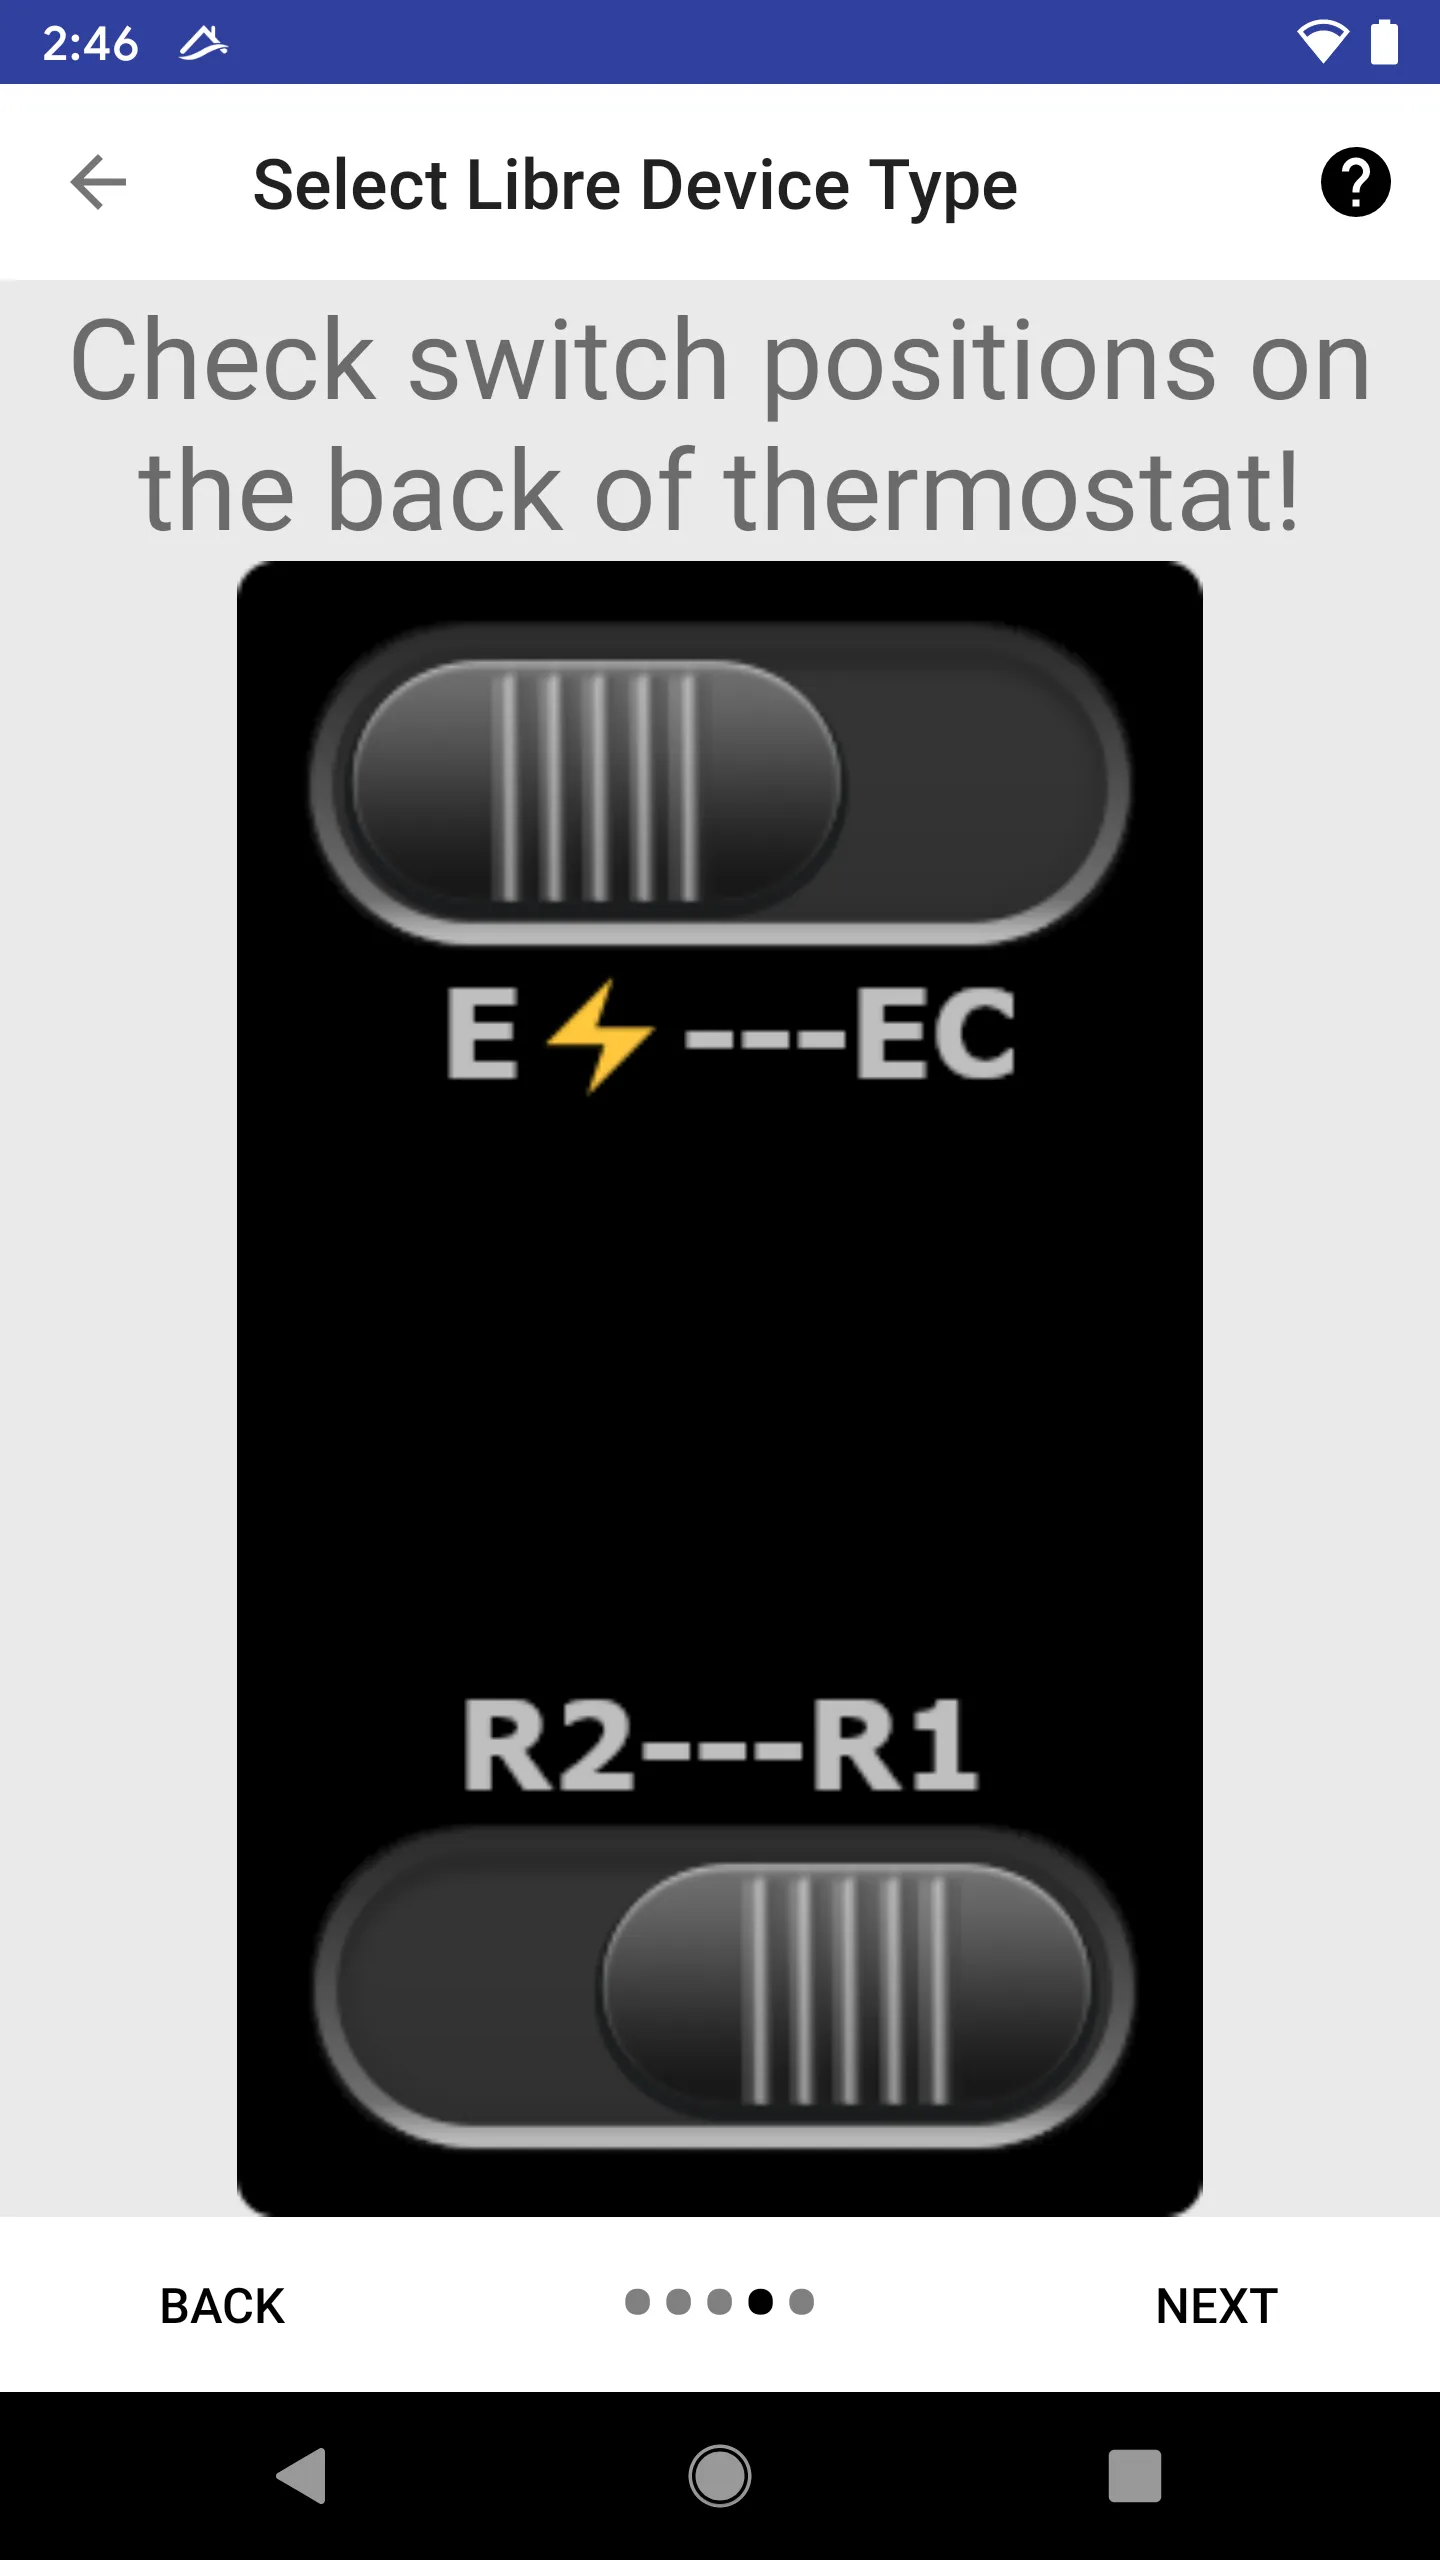
Check Wiring
The smartphone will generate the correct wiring diagram based on your choice. Please check the wiring.
Note the positions of two switches on the back of the thermostat must be set to set to correct positions. Incorrect settings may damage your system or render units non-functional.
Wire New Thermostat
Make sure the new thermostat is wired according to the diagram. The thermostat has to be wired so that it has power to complete the join process.
Note, if the user intends to join through recovery (device previously joined another network), it is safer to initially only connect the 24VAC and “C” wire (two wires). And connect the rest of the wires when successfully joined.
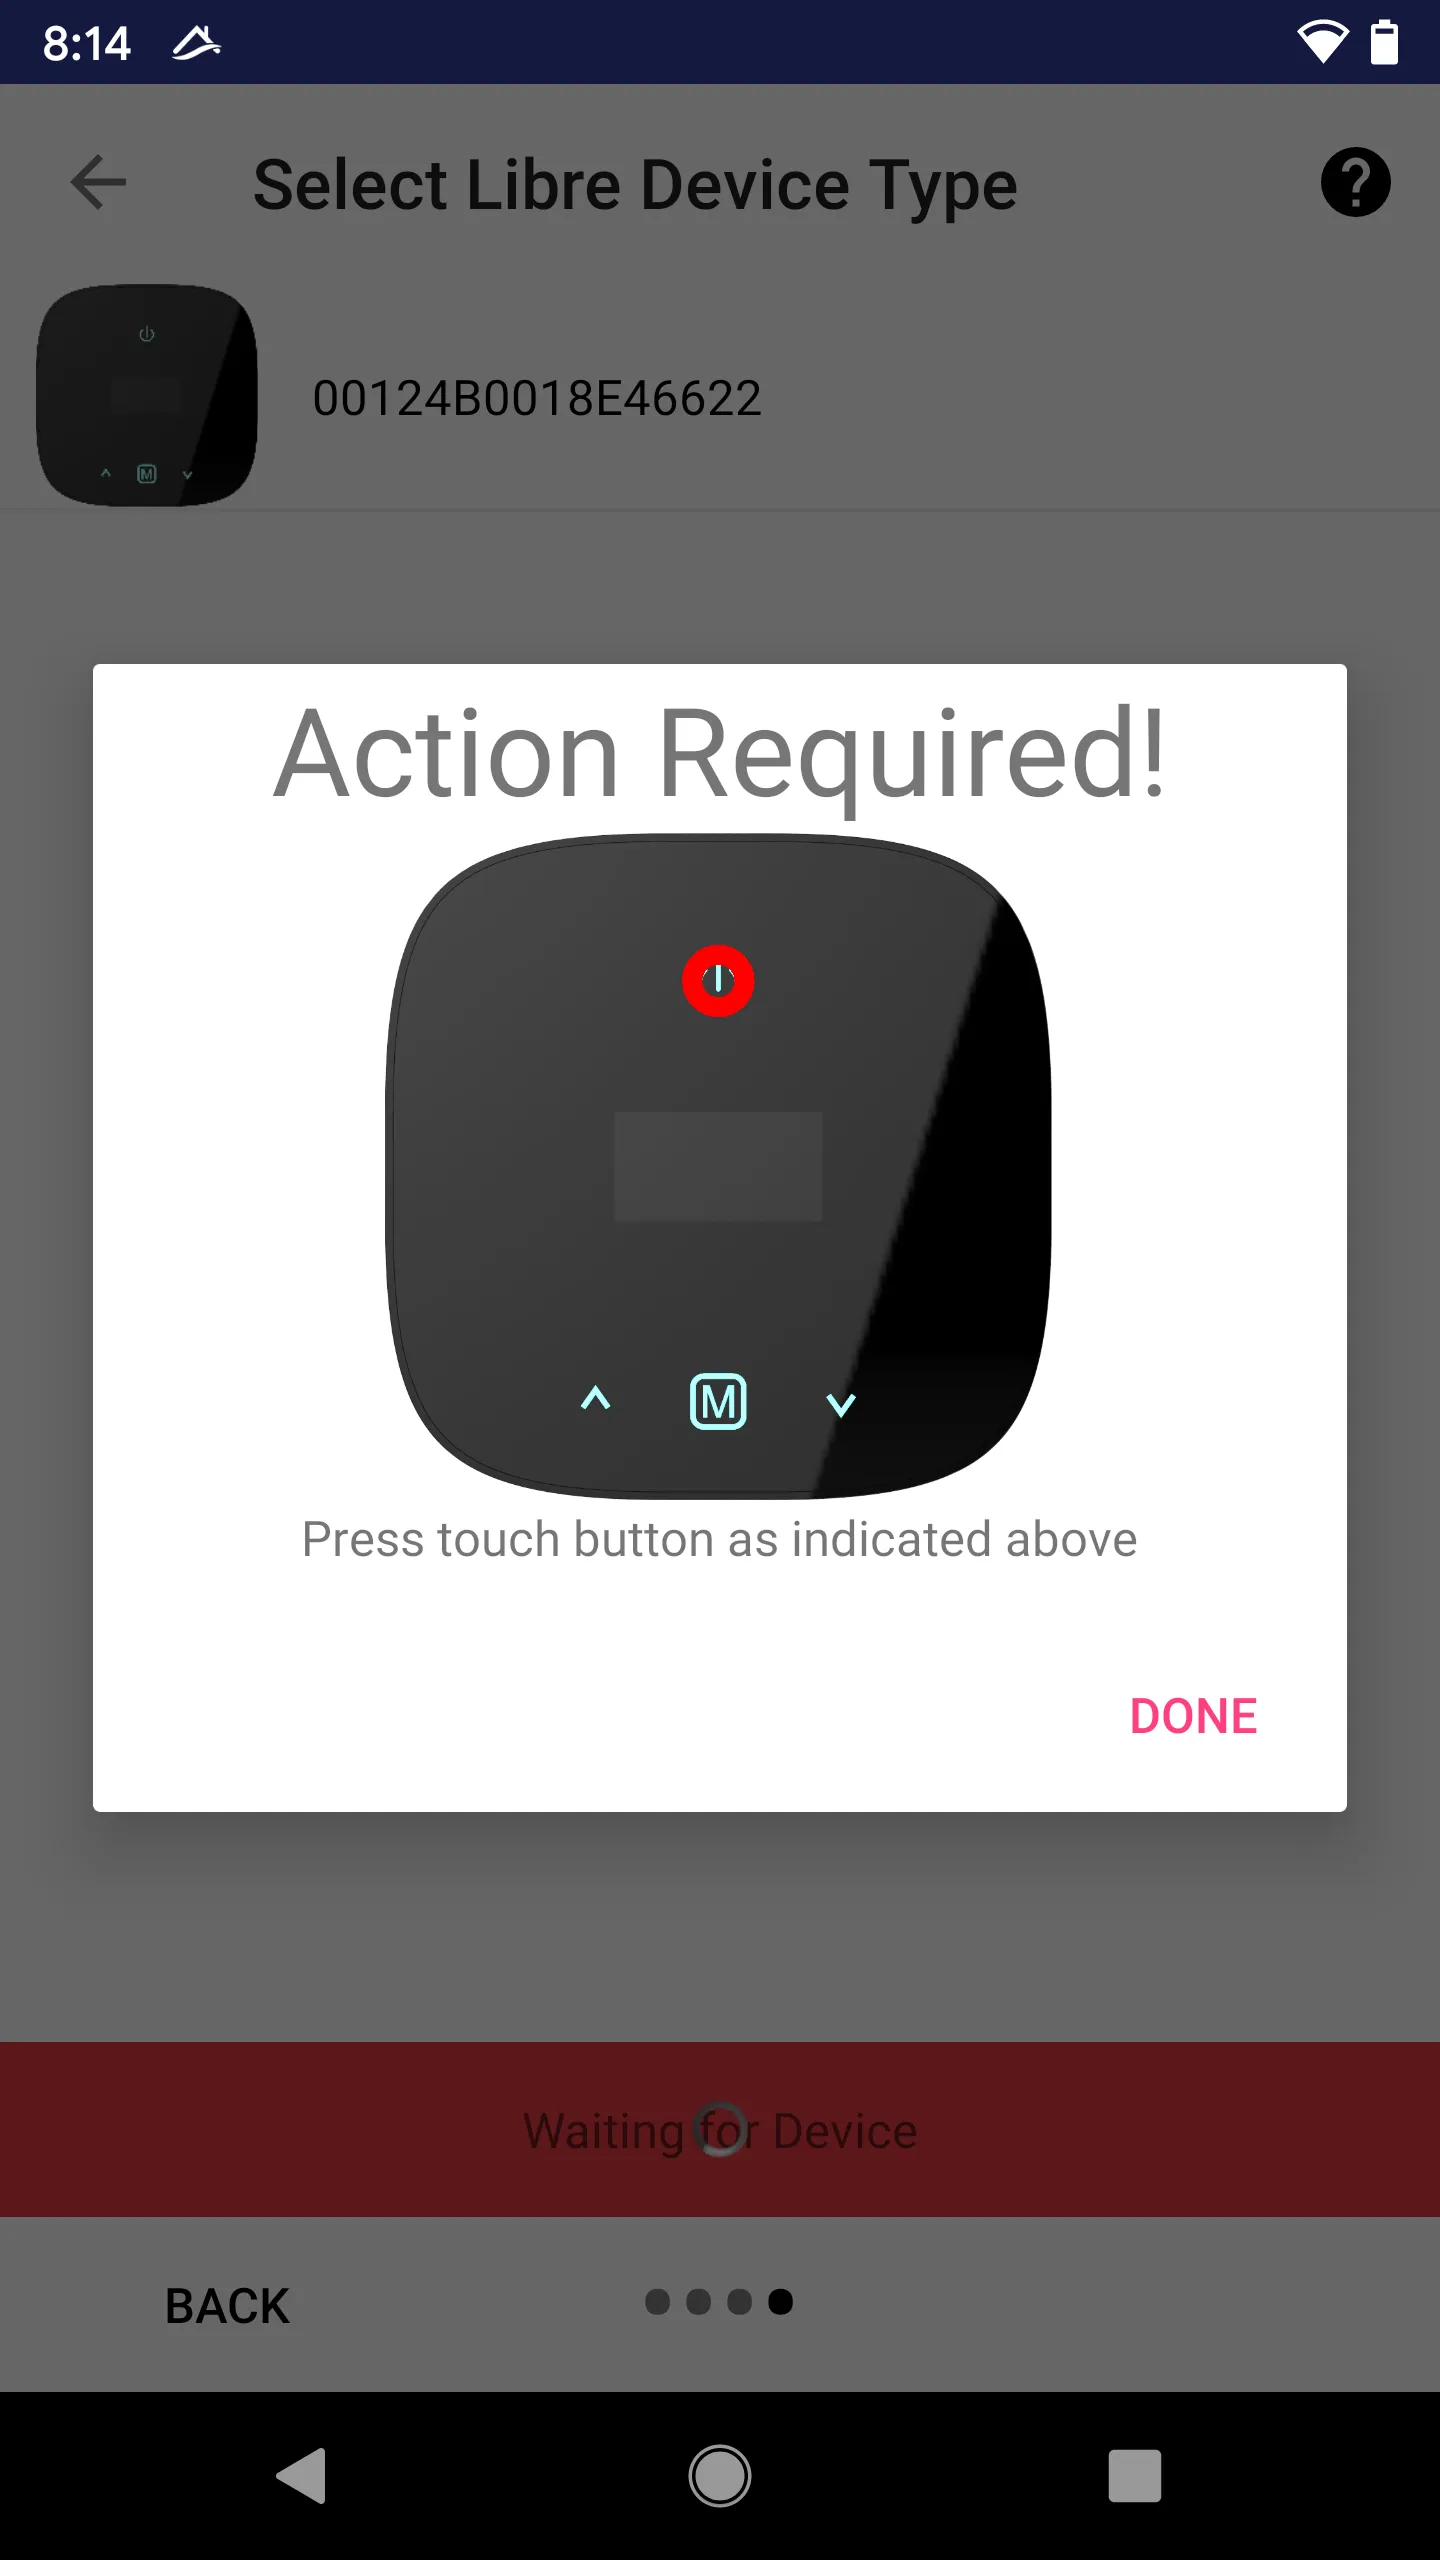
Searching Device
Follow the on-screen prompt, press button on the device.
For recovery, you need a paperclip pin to push the reset button.
Wait for about 30 seconds, the joining device shall appear on the list.
Troubleshoot
If the device is not found in about 30 seconds, “action required” will prompt again.
Choose Join Device
If the device is successfully found, the picture of the device shall show up on the list. Choose the device from the list.
Follow Prompt Again
Once a device is chosen, you may be asked to press the button again (repeating the discovery process).
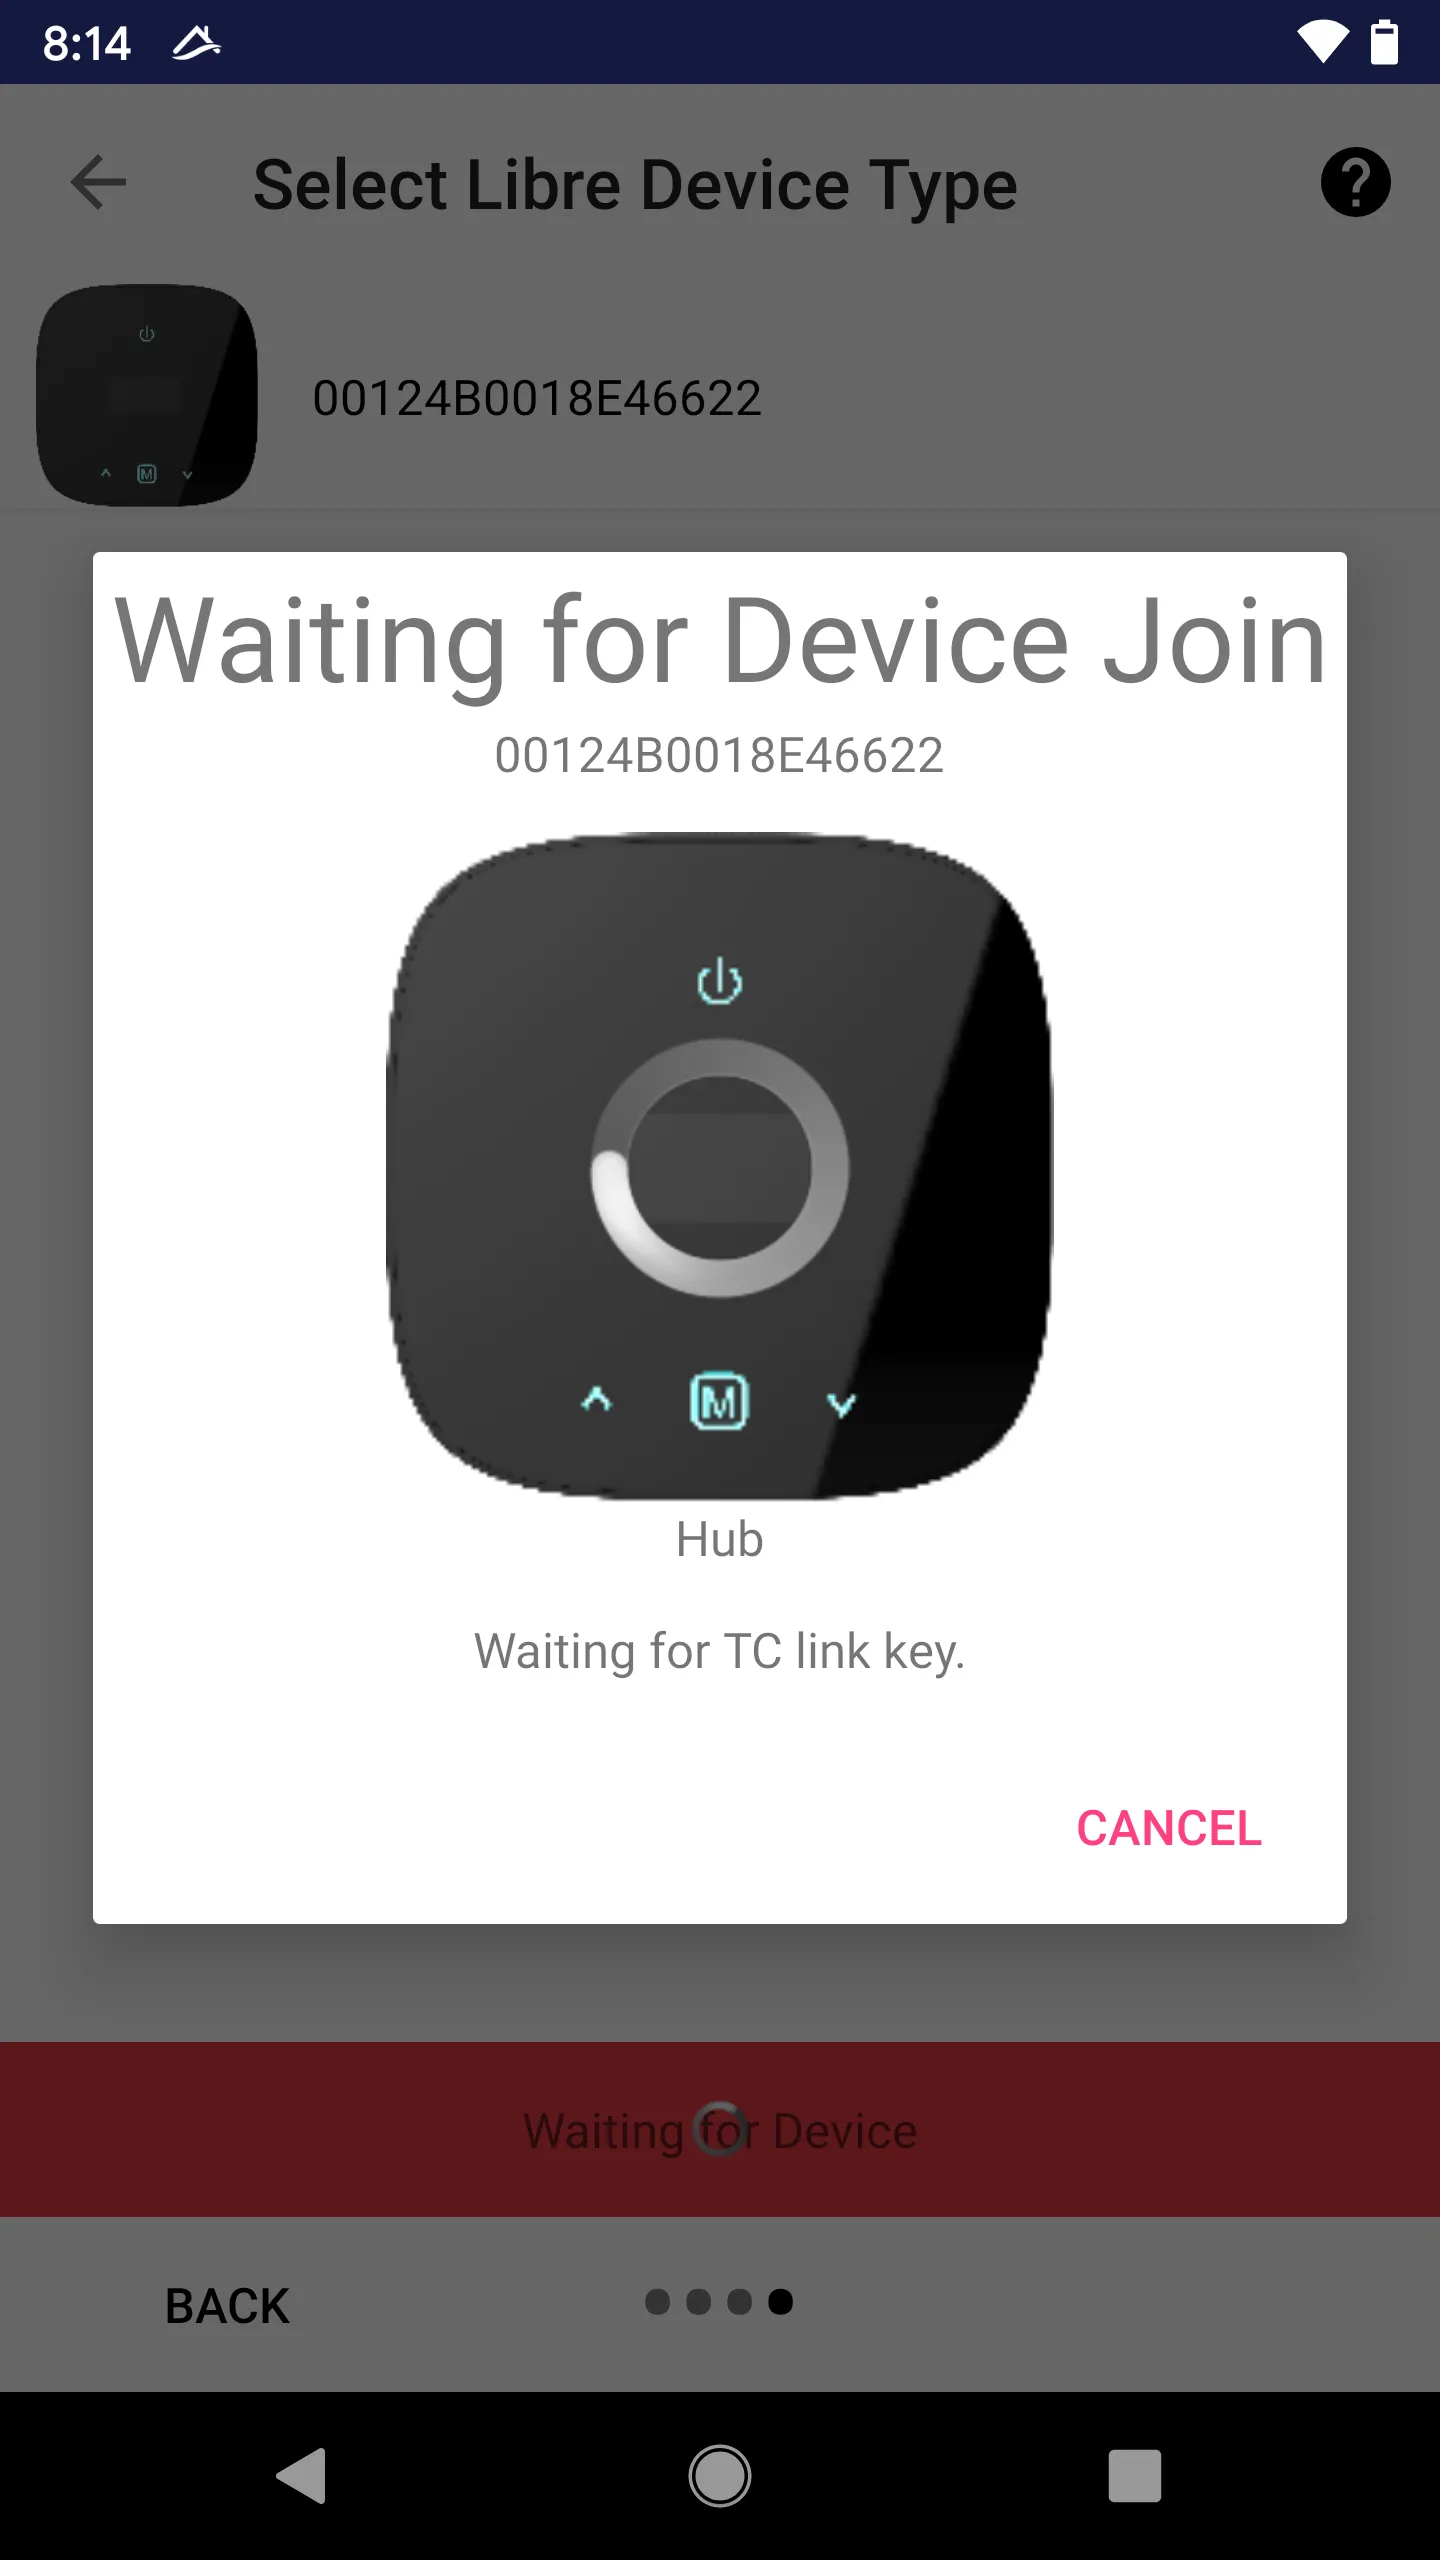
Join in Progress
If the “Join Accept” signal is successfully sent to the device, the status will show up on the progress screen.
For example, in the screenshot below, the new device (a multiple button dimmer) is joining through “Hub”, and the current status is “Waiting for TC link key”.
Be Patient
The join progress, including encryption key exchange and device information query, may take about 2 minutes. Please be patient and wait!
Join Success
Once the join process is completed successfully, the user is required to give the device a name and an icon.
Read “Device Name & Icon” for more details.